Quantcast
Channel: Ty Ford Audio and Video
Viewing all 84 articles
Browse latest View live

Sennheiser MKH 418S: Stereo/Shotgun Mic

$
0
0

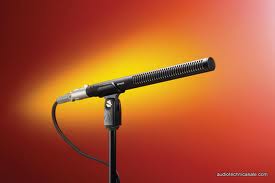
Sennheiser MKH481S Stereo/Shotgun Microphone

The Sennheiser MKH 418 S stereo/shotgun mic is an obvious and welcome extension to Sennheiser's industry standard MKH 416 shotgun. Sennheiser has lengthened the interference tube of a standard MKH 416 to accommodate a figure of eight capsule positioned directly behind the front facing mono capsule and created a Mid/Side (MS) stereo mic.


A quick comparison of the internal electronics also reveals that the new MKH 418S uses SMT (surface mount technology). By comparison the original MKH 416's caps, diodes and resistors look like quite a jungle in the body's cavity. On paper, the specs of the front facing elements of both mics look the same. I connected both to a Sound Devices 442 stereo mixer. The two sound very similar. My nicely aged MKH 416 sounds like it's peak is a bit more aggressive than that of the MKH 418S. The MKH 418S mid element has slightly more air, may be slightly less sensitive overall and have slightly less LF response. Incidentally, to use just the center shotgun element of the MKH 418S, you have to apply phantom power to both capsules. Powering just the center capsule results in a significantly lower sensitivity.
Some folks imagine a stereo/shotgun mic to be capable of capturing distant sources in stereo, while ignoring closer sounds; sort of what one might expect from a pair of binoculars. That's not how it works. A stereo/ shotgun mic is either a stereo mic or a shotgun mic. However, you can use the side capsule to add some stereo information to the mono shotgun.
That may be all you need to increase the size of a narrow, central sound source. If your sound source is wider, you need to bring up the side element to widen the stereo field and minimize the central beam. Of course raising gain of the side capsule also increases the noise floor a bit. Because the elements are arranged as MS, monitoring through a simple preamp or mixer in stereo will not sound right. 
You'll have the figure of eight side capsule in one ear and the mid capsule in the other. You need a preamp or mixer that can "decode" the MS signals into stereo. The Sound Devices 442 mixer let's you do it two different ways. You can decode the MS at the mixer and send regular stereo out of its stereo outputs, or pass the MS audio to the outputs and switch only the headphones to decode the MS, which can be very helpful during mic placement.
YMS?
Why is MS such a weird system? During film shoots, sometimes not even the director knows if the final shot will be wide, narrow or somewhere in between. Recording MS lets stereo sound be recorded in the field which can be adjusted to virtually any width during postproduction. Because the side and front capsules are not vertically aligned, there's a loss of accurate directionality from a point 90 degrees off axis on each side and around back to 180 degrees. As such, you want to keep sound sources in front of the mic. This is pretty much standard for any stereo mic with a side capsule mounted directly behind a mid capsule.

I mentioned that the MKH 418S seemed to have slightly less LF sensitivity than my MKH 416. I took both for a walk outside with the Sound Devices 442 mixer. Engaging the Sound Devices 442 80Hz LF roll off pulled a lot of the mud out. Additional LF sweeping of the 442 left a final settings which supported my perception that the MKH 418S has slightly less LF response. There aren't many situations in which I don't roll off the low end of my MKH 416, so the minor loss of low end in the MKH 418S is more a benefit than a problem. A quick step outside confirmed that, without a Softie or blimp, even a mild breeze was enough to ruffle both shotgun elements.
ON LOCATION
I packed the MKH 418S along with other mics on a Maryland Public Television shoot. We were shooting a piece on the Baltimore Mandolin Orchestra; a group comprised of about 30 players of mandolins, mandolas, mandocellos, several acoustic guitars and a mando bass. The recital was held in a medium sized church. We also needed to shoot some interviews and a quartet in a smaller space. In the first interview set up, the conductor sat, surrounded by the various instruments, and picked each up to ex- plain it and then played each a bit. Because we were shooting with two Digital Betacam cameras set up for 16:9 (widescreen) there wasn't much room to get a mic exactly where I might have wanted it.
I rolled up my jacket, put it on the floor, and used it to prop up the 418S, aiming it at the conductor's chest, about four feet away. When he spoke, I pulled back on the side capsule, relying mostly on the mid element. When he played, I raised the side capsule so that the instrument widened and filled the headphones a bit. Either way, I was very pleased with the effect and the sound.
The quartet set up in the same space. This time, I put the mic on a stand and positioned it slightly above the instruments of the seated players at a distance of five feet. I tweeked the side capsule so that the instruments appeared nicely in the stereo field. I mentioned to the performers that the lead mandolin player was playing louder and that they could bring up their playing volumes a bit. They did. It sounded fine, even with the 80Hz LF rolloff set on the mixer to scrape off some ambient grunge.
The main church presented a different set of problems. The orchestra was set up in front of the altar. With 30 players, that meant a group that was about 40 feet wide and 20 feet deep. This proved to be too wide and deep for a single 418S so I resorted to three spaced omnis in an Left/Center/Right array across the front. I'd have preferred a raised position, closer to the group and looking down on them from above, but that was not an option.
IN CONCLUSION
As one might expect, no one mic does it all, however, the Sennheiser 418S brings a lot to the table. As EFP and ENG crews seek to enhance their mostly mono field audio, the 418S is a likely candidate. In the "run and gun" flypack environment, there isn't a lot of time for post production. If there's no budget for a sound person with a mixer to properly decode the MS signal to stereo, a small, lightweight MS decoder for cameras would be a useful tool. In the studio, the MKH 418S's almost coincident capsules solve a lot of phase cancellation problems created by using too many mics. Sennheiser offers a 3.5 foot, five-pin to double three-pin XLR cable that splits coming out of the five pin. My suggestion would be to keep the pairs together in one cable for at least 12 feet before splitting. This will allow a single cable to be wrapped around a boom. It will also keep the pair of three-pin XLRs from slapping the boom. The current split cable is color coded; yellow and red. I was probably not paying attention in class the day this was discussed, but having yellow be the mid element seems counter intuitive.

Ty Ford may be reached at: www.tyford.com
Application: Studio, ENG, EFP
Key Features: 48V Phantom powered MS Stereo mic
Technique, Inc. © Copyright 2003 All rights reserved


Sanken CS-1 Short Shotgun -- But Is It A Shotgun??

$
0
0

Sanken CS-1e
The Sanken CS-1, and for that matter the Sanken CS-3, were both modified shortly after they came out. The new versions are the CS-1e and CS-3e. It's been some time, but I recall the modification had to do with lowering the noise figure on each mic.

This is a review of the original Sanken CS-1 I wrote shortly after it came out.  As I get more information from Sanken, I will modify this article.

The Sanken CS-1 short shotgun (now about $850) is aimed at the professional ENG and EFP markets. On the outside, it looks like any other interference tube shotgun mic. Shotguns traditionally have a small capsule at the rear end of an interference tube. Slotted ports down the side interfere with sound entering from the side in a calculated way, allowing sound, especially high frequency sound, to enter only from the front.

Most shotguns are surpisingly more omni directional at mid and low frequencies. This limits their effectiveness in slappy interior spaces and even in exteriors when the mic is on or near a large, flat, hard surface such as a macadam (asphalt) parking lot.

BREAKING THE RULES
The Sanken CS-1 appears to be a short shotgun. It's even called a short shotgun and although it looks like one from the outside, It's not. When I saw the first version of this mic at NAB 2003, I was struck by the fact that there was no opening at the end of the tube. Regardless, when you waved the mic at a source, its pattern of reception behaved very similarly to that of a traditional shotgun. There also appeared to be fewer mids and lows coming in from the side.

When the latest version arrived for this review, an open grille had been added to the front end. I took a peek inside. To my surprise, the usually empty interference tube was completely stuffed with circuit boards and several thin rectangular diaphragms. The phasing of the diaphragms is used to create a supercardioid pattern similar to that of a shotgun.

My own kit includes a Sennheiser MKH416 (mostly for exteriors and acoustically treated soundstages) and a Schoeps CMC641 (for interiors and exteriors when reach is not a factor). The task, then, was to determine what the three mics had in common, and how they differed.

The Sennheiser MKH416 lists for $1,275, the Schoeps CMC641 with clamp and B5 pop filter for $1,180 (1n 2012, about $1800 USD). The Sanken CS-1 lists for $795. That certainly makes it more attractive. At a length of just over seven inches, the Sanken CS-1 is shorter than an MKH416 and a few inches longer than a CMC641. If you're running with a camera mounted shotgun, you may be attracted to the CS-1's shorter tube. The CS-1 and CMC641 each weigh about four ounces, the MKH416 just under six ounces. Only you can decide if carrying two more ounces around all day makes a difference.

My first sound comparisons were done in my studio; a very quiet space with a balance of absorptive and diffusive treatments that result in a tight, but not dead environment. Head on and at very close range (less than a foot) the CS-1 exhibited a slight dip and return in high frequency response as I moved from directly on axis to the edge of the mic's hot spot. At edge of frame closeups of a foot or more, however, the dip is not apparent. The mid and far patterns remain fairly constant at about two feet wide, outside of which, a noticeable roll-off occurs.

The CS-1 had more selfnoise than the MKH416. Not as much as my Countryman EMW lavalier or Sony ECM 88, but still more than the MKH416. The MKH416 is about 2.5 dB more sensitive than the CS-1. When I adjusted my preamps to make both mics equally loud, the selfnoise of the CS-1 was even more apparent.

Some people use the MKH416 as a voiceover mic, working it at a distance of one to three inches. At distances of a foot or less, the MKH416 had more upper bass/lower mid chest tone which made voices sound bigger and closer. At a distance of a foot of more, in my acoustically-controlled space, the width and reach of the patterns and the frequency response of the two mics were similar. Both mics got roomy at about the same distance. At ninety degrees off axis, the CS-1 had much less high frequency response than the
MKH416. Off the back, the CS-1 had more high frequency response than the MKH416.

I'm not a big fan of camera mounted mics. As a sound guy, most of the cameras I've been near are just too noisey for me to even think about mounting a mic. I'm sure there are some relatively quiet cameras out there. I just haven't heard them yet. In this test, the CS-1 didn't do quite as well as the MKH416. Probably because the capsules are mounted along the side of the CS-1 shaft.

The CS-1 also had more selfnoise than the Schoeps CMC641. Up in the acoustic of my relatively average living room, at a working distance of two feet, the CS-1 had more room ring than the CMC641 and even with the Sound Devices 442 mixer adjusted to the first (80 Hz) high pass position, the CMC641 exhibited more low end.

UNHAPPY TOGETHER
I ran into an unusual problem when I fired up my Sound Devices 442 mixer and plugged in the mics. The CS-1 and 442 were not happy together. The mic and/or mixer went into oscillation. I contacted Sound Devices and Plus24, the distributors for Sanken, and was told this was something they were working on and they suggested engaging the high pass filter would solve the problem. It did. Apparently this problem is specific to the 442. The problem never evidenced itself with any other preamp I tried, including an old, noisy Shure FP31. (I believe this was one of the problems addressed and fixed in the Sanken CS-1e.)

In the living room, as a hand-held mic, with a working distance of six inches to a foot, the MKH416 provided more chest tone, less room and slightly less high frequency response. At a distance of two feet the MKH416 sounded a little more focused than the CS-1. At four feet, they were very similar.

HEADING OUT
Outside, in suburban Baltimore County, the differences between the the CS-1 and MKH416 became less noticeable. The distant din of automobiles on I-695 and I-83 covered up most of the selfnoise. Because I knew it was there, and because the frequency of the CS-1 selfnoise was higher in pitch, I could pick it out. In town, I probably wouldn't have been able to hear any selfnoise at all. Beam widths of the two mics were very similar as was their reach.

IN CONCLUSION
I give the Sanken engineering team a lot of credit for coming up with an extremely unique product. They have, in effect, redesigned the shotgun mic. Although I doubt that anyone who owns an MKH416 will stop using it in favor of the CS-1, Sanken will probably pick up support from those who don't have $1,275 to spend on a MKH416, especially if they record in noisy locations like "media circus" press conferences.

Technique, Inc. © Copyright 2012 All Rights Reserved

Contact Ty Ford at www.tyford.com

MCA SP-1 Cardioid Condenser Mic

$
0
0

MCA SP-1 Cardioid Mic
A few years ago, a friend sent me one of these SP-1 mics so I could evaluate it. His thought was that it sounded like it should cost a lot more than $39.99, which is what it streeted for back then.


I got it. I listened. It does sound like a much more expensive mic. I suggested it to a friend a few months later and he bought two. He recorded some audio and sent me the tracks.
Yup, sounded pretty much the same.

This is a Chinese mic and they typically don't sound all that good. Not edgy the way so many Chinese condenser mics sound. If you're down to you last $50 and it's a choice between a rent payment and this mic, pay the rent. If you need a good sounding cardioid condenser mic. Give it a shot!

Neumann TLM 102 - The VolksMikrofon

$
0
0

Neumann TLM 102

The Volkswagen is named so because it was designed to be "a car for the "volks" or people." Neumann makes world class microphones that typically cost more than most personal budgets can support; until now.

Should you wonder, after a very quick listen, the TLM 102 and TLM 103 sound very different. The TLM 102 is relatively flat with a closer focus on the midrange than the TLM 103. What does that mean? It means that the TLM 102 can be less problematic in environments that aren't designed as recording studios. 

The TLM 102 is considerably smaller than the TLM 103, but that difference in size does not mean the TLM 102 is a proportionally lesser microphone.

I really like that Neumann has taken a leadership position in swinging the pendulum back from the years long industry trend of making mics brighter and brighter. Brighter is not better, especially when you start using dynamics plugins aggressively or record in a non-optimal acoustic environment.

FEATURES

The TLM 102 is made at Neumann in Germany. The new single sided, backplate charged K 102 capsule borrows raw materials from the U 89i and BCM series. The working surface of the gold sputtered diaphragm is slightly less than an inch in diameter, but as with the U 89i, TLM 170 and TLM 93, is still a large diaphragm. 
The TLM 102 was designed to be more road-worthy than the TLM 103. Which is to say, you can actually consider using a TLM 102 at a live event. To increase the roadworthyness, Neumann engineers have designed a “crash helmet”; an absorptive plastic fitting that sits atop the capsule so that should the mic do a header, the fitting will absorb some of the impact. Although given the clearance between it and the headgrille, I cringe at the force required to make that happen.
The headgrille is only two layers of metal mesh, not three, but there’s a thin, washable foam liner inside the mic to stop plosives. Where plosives are not an issue, the foam liner may be removed for more transparency. That’s easily done because the chrome-plated ring around the middle of the mic unscrews, allowing the headgrille to be removed. 
TLM 103 has a rubber snuggie that surrounds the circular PCB, reducing vibration to the capsule. The TLM 102 doesn’t. As such, tapping the TLM 102’s body produces a noticeably louder bump. If you don’t have the bucks for a new EA 1 suspension mount, check your mic locker. The TLM 102 uses the same suspension mount as the TLM 103, 127, 193 and m147 tube. A less expensive suspension mount for the TLM 102 is in the works.
The TLM 102 cardioid pattern has soft shoulders and is slightly more narrow than that of the TLM 103. That can be very helpful in efforts to “tune out” unwanted nearby sound sources. The TLM 102 sounds thicker than the TLM 103 and doesn’t have quite the “air.”
IN USE
As a rule, you never stick a LD cardioid condenser mic in front of the soundhole of an acoustic guitar. The TLM 102 is much less boomy and with a little high-pass filter, you could track with it. My D28S Martin, through GML preamp, did very well. In fact, I could get a lot closer then with other mics. This may be helpful if you’re recording in a less than optimal acoustic environment. 

I used to use my Mackie 1604 preamps as a test option. The high end of the TLM 103 sounded pretty nasty through them compared to better preamps. I sold the 1604 this year so I can’t make the  same test with the TLM 102, but given its HF response, I’m betting it will be a better match.
There are some pretty rude and not very full bodied acoustic guitars around these days. The smooth response of the TLM 102 without the emphasized top end works nicely to make those guitars sound better.
I plugged my thinline Telecaster into my Vibrolux and let the TLM 102 have it up close to see what would happen. It took the assault and gave me back a meaty track. The highs were there, but they didn’t shred. I’ve got Humbuckers on the Tele, so it seldom gets really nasty, but I don’t want it to. That’s why I have it set up that way. 

I couldn’t crank the amp up all the way and close mic because the GML preamps start at 25 dB of gain. Years ago, during my review of the TLM 103, someone from Neumann mentioned that the mic was so sensitive that, provided you could get it some Phantom Power, you could plug it into a line input for really loud sources. I did and it worked quite well. The TLM 102 is only about 3dB less sensitive, so you may be able to do the same.
VO
Even with a beefy sound, the TLM 102 has enough top end to cut through without EQ. When crowding the mic to get the proximity effect working, I got three inches away without getting too much bottom. I was able to get a more neutral NPR-ish sound at a distance of six inches, but preferred a working distance of 3-4 inches with some proximity effect. The TLM 102 is poppable, but no more than any other good LD condenser.
SUMMARY
Street priced to sell at $699 ($1099 list) in silver or black with the black SG 2 sturdy metal mic clip, Neumann’s TLM 102 can’t help but draw attention to itself. It sounds good and its smaller size means it’s less visible and may also be considered for drum micing. For some $699 is still a lot of money to throw down for a mic. I’ve heard a lot of $699 mics that don’t sound nearly this good. 

Technique, Inc. © Copyright 2009 All RIghts Reserved
Ty Ford may be reached at www.tyford.com

Rode NTG-3 Shotgun Mic - Ready For Action

$
0
0

This Australian-made Rode NTG-3 microphone ($699) seems extremely well-placed for its price and performance. Like the Sennheiser 416, the NTG-3 is an RF-condenser unit that combines a somewhat sophisticated RF circuit with the capsule to reduce the deleterious effects of high humidity. It's tricky to design, but worth the effort. That design element has contributed greatly to a "bullet proof" reputation for similar mics and should do the same for the NTG-3. 

FEATURES

Rode NTG-3
The RF environment is growing significantly more hostile, though, and Rode seems to have taken shielding a bit farther than some other manufacturers. Attention to the mechanical and electronic layout of the NTG-3—including the surface mount technology (SMT), PCB layout, component selection and dual chamber design of the internal brass tube that appears to separate most of the circuitry from the tunable RF section and capsule—all contribute to RF immunity and mic performance. 
The upper chamber and part of the lower chamber of the internal metal tube in which the circuitry and capsule sit is completely covered by a thin grounded metal mesh. Just behind the capsule a rubber o-ring in a small groove and one closer to the tip snug the internal metal tube inside the slotted outer tube. The internal tube runs the full length of the outer tube for increased shielding. A small foam plug about a half inch thick sits within the top of the internal tube to reduce popping. The extended upper section of the internal tube, above the capsule, has two rows of precision holes drilled on opposing sides covered with a thin fabric to mechanically filter the sound once it has already been filtered by the slots on the outer tube.

Rode also adds some further insurance by integrating their longer ground pin (1) into a very well designed grounding scheme. The XLR connector used is not stock. Its base is machined from solid brass and the ground pin is permanently mounted into that case. Pins two and three are isolated via Teflon bushings. All pins are gold-plated.

The Rode NTG-3 employs a line gradient supercardioid capsule. Output impedance is 25 ohms. Sensitivity is listed at –30 dB re 1 Volt/Pascal (31.6 mV @ 94 dB SPL) +/– 2 dB @ 1 kHz, EIN noise is 13 dB-A, and it can withstand a 130 dB sound pressure level. The NTG-3 weighs less than 6 ounces and it matte champagne finish is not reflective.

It's not unusual to have to roll the low end off on a 416 these days unless you're in the middle of nowhere or in a studio. Sanken rolled off the bottom a bit with their CS-3e and Rode has followed suit with the new NTG-3, so there's not quite as much in the upper bass or lower midrange on the NTG-3. That makes it slightly crisper and brighter—more so when used very close. As you back it off, though, normal air diffusion makes any high-frequency differences between the mics pretty unnoticeable. However, the fact that my 416 is more than 15 years old could suggest that it might not be as bright as it once was. Regardless, with a zep and a furry, of course, you'll lose a bit of top end.

IN USE

The NTG-3 pattern is a little wider than that of the 416, with more gently sloping shoulders. This translates into a more forgiving pattern for two-shots, but you'll also hear a bit more ambience. My 416 has a little spot about 90 degrees off axis where there's a slight return of high frequencies. The NTG-3 does not. Both mics sound about the same from the rear. The NTG-3 sounded fine when used with my K-Tek carbon fiber boom and a Rycote Softie suspension mount. The NTG-3 had less low frequency boom handling noise, mostly because the 416 has more low frequency response.

After checking for interference pickup from my Verizon cell phone sitting next to the NTG-3, I made a point of taking the NTG-3 to the mall, along with my location recorder and headphones, to visit T-Mobile, the Apple store and AT&T. There was no interference observed, even with cell phones operating right next to the NTG-3. I was using Whirlwind Accusonic +2 cable and connectors. The shield was not tied to the XLR shells.

SUMMARY

The Rode NTG-3 appears to be a very solid piece of gear. The efforts to eliminate RF are noted and appreciated. I like the unique and very handy padded metal storage tube. The foam windbreaker and simple mic clip all add value to the package. I think you'll be seeing NTG-3s show up in more kits soon. At the moment, I can't see why not. Nice job Rode.

List Price $699
Technique, Inc © Copyright 2008 All Rights Reserved. Contact Ty Ford at www.tyford.com

Neumann TLM 103D - Intelligent Mic with A Memory

$
0
0


Neumann TLM 103D
The Neumann family of Solution D digital mics currently includes the TLM 103D, the flagship D-01 and the KM D series (KM 183 D, KM 184 D and KM 185 D). The TLM 103D has an internal 24/192 kHz A/D converter and channel strip DSP. The TLM 103D may be used by itself without the channel strip, if used with the connection starter kit that provides power to the mic and a simple AES output. The full blown three-part system is comprised of one or two TLM 103Ds, RCS software and the two input DMI-2 digital mic interface.  

The channel strip is accessed via high-functioning, Mac and PC-compatible RCS software. From it you can see each mic’s, pattern (if adjustable, which pattern), pre attenuation (-6, -12, -18dB), gain (0-63dB), variable low cut, de-esser, test signal with tones, comp/limiter, peak limiter, mute, polarity reversal, LED on-mic light intensity, sync, AES 42 info and other features. Settings are stored in the mic. The TLM 103D, then, is an “intelligent mic with a memory.” The DMI-2 interface can support two AES42 digital mics, each of which with it’s own preamp and channel strip.

IN USE
Neumann DMI-8 interface and RCS channel strip software
The RCS software is a great idea; a software adjustable channel strip built in to each mic. There’s also an undocumented built in limiter that makes the TLM 103D virtually uncrashable. It’ll sound pretty gnarly when you push it too hard, but it’s almost impossible to flat top. The only part I’d tweek is the de-esser built into the compressor. It turns the Comp/limiter into an EQ dependent limiter with fixed 1kHz, 2kH, or 4kHz. Most of my de-essing needs are above 4 kHz. Shelving takes too much off the top. 
I first used a standard 4-foot XLR cable between the TLM 103D and the DMI-2 and an AES to S/PDIF baluns from the output of the DMI-2 to the S/PDIF input on a DIGI 002R Pro Tools LE system. That worked without problems and when I switched to a Mogami AES/EBU cable between the mic and DMI-2, I heard no difference. 
Neumann DMI-2 back panel
I put up one of my analog TLM 103 mics, using an Aphex 1100 preamp, and compared the analog TLM 103 to the digital TLM 103D. With both mics up together, I noticed that the TLM 103D was not as bright as the analog TLM103. This turned out to be brightness added by the Aphex 1100 preamp. I summed the mics together and heard some high frequency loss. After recording separate tracks into PTLE 7.4, I zoomed in and found the TLM103D was 21 samples later on the timeline than the analog TLM 103. 
I switched to a DIGI 003R using a GML mic pre and RME ADI-8 DS A/D converter together, both with and without Word Clock. By themselves, the mics sounded more similar than on the DIGI 002R rig. When I summed them to mono I could hear the phase cancellation. Relative to the DIGI 003R A/D converters, the RME ADI-8DS hit the timeline 31 samples later and the TLM 103D hit 46 samples later. Neumann reported that they too had experienced similar timeline shifts. If you know your rig, This is a minor inconvenience; similar to the one faced when trying to resolve the timing differences due to a source’s differing distances from two or more mics. 
The rest of the evaluation was uneventful and the TLM 103D performed very well. I have heard the TLM 103 sound spitty when mated with a few unflattering preamps. Not this time. Spoken word and sung vocals were crisp and clean. Using the RCS software’s high-pass filter I was able to get the TLM 103D within five inches of the sound hole of my D28S Martin to record some exceptionally nice tracks. 
I also found I could alter the thickness of the sound with the Compressor/Limiter by choosing the three different de-esser frequencies and adjusting the ratio and threshold settings.
IN CONCLUSION
Having owned two analog TLM 103 for a number of years, I can’t help but like the TLM 103D. Maybe you don’t already have a rack full of external preamps. Maybe you’re just starting out and want something better than the preamps and A/D conversion in a stock DAW. If you’re only adding one or two tracks at a time, The TLM 103D can make even an mBox sound better than it would otherwise. A firm digital path has been set. Others will follow.
Technique, Inc. © Copyright 2008 All Rights Reserved
Ty Ford has been writing for PAR since the first issue. He may be reached at www.tyford.com.
Fast Facts:
Applications: Commercial Studio, Project Studio 
Features: 24/192 digital cardioid condenser mic with DSP channel strip.
Price: TLM 103D sold separately, $2,650. With a Neumann EA1 suspension mount and basic Connection Kit, $3,298.00, list. With DMI-2 interface box and RCS software $4,100. 
Contact: 
Neumann USA
1 Enterprise Drive
Old Lyme, CT 06371
Tel.: +1 (860) 434-9190
Fax.: +1 (860) 434-1759
E-mail: neumann-help@neumannusa.com
Product Points:
+ 24-bit 192 digital mic, quiet, virtually clip-proof, channel strip.
- Latency issues, pricey unless you add up all the parts.

“The Score”: Inclined and designed to make analog preamps insecure and jealous.

Focusrite Saffire Pro 40 Firewire Interface

$
0
0


Focusrite Saffire Pro 40 Front and Back Panel

I’m running Mac Lion and Pro Tools 10 on a 2 x 2.4 GHz Quad Core Intel Xeon Mac with 32GB of RAM. I make my living with this and other Macs. In the past, I have run into problems by trying to be too close to the cutting edge. Just before I began the installation of the Focusrite Saffire MixControl and driver software, I did a search to see if there were any problems. I called the US offices of Focusrite in California and asked to speak to someone who could talk to me about any conflicts. I spoke to Raul Resendiz, who assured me that there were no worries, but pointed me to the Focusrite Saffire Pro 40 download page to get the latest version of the driver and MixControl. The install was easy.
I’ve been using Pro Tools LE software since Version 6, and have become very comfortable with it. In front of a DIGI003R, I have GML and Millennia Media preamps going to an RME ADI-8 DS A/D converter with an ADAT lightpipe that goes into the DIGI003R. So I bypass the Digidesign preamps and A/D conversion. The result is a much cleaner, higher-quality signal than a DIGI003R can provide.
Focusrite’s MixControl, an I/O matrix and GUI monitor controller, adds a new wrinkle. I mentioned to Resendiz that Pro Tools already had that, and having another screen of things to click on sounded redundant. Do I need another monitor to see this other screen? That might be a deal killer for me. Resendiz said that once the system was configured, I wouldn’t even have to have MixControl running, unless I wanted to use it for routing audio to external devices, e.g., for setting up complicated headphones mixes. I powered down the DIGI003, swapped the FW400 firewire cable, ADAT lightpipe and other audio cables to the Saffire Pro 40 before powering it up. Not seeing an instant reaction, I thought something might be wrong, but the Saffire Pro 40 takes a few seconds to power up.
I started Pro Tools, and chose Saffire from the Pro Tools Playback Engine menu. A light on the Pro 40 front panel indicated the firewire connection was working. I chose the Saffire from the Pro Tools setup menu. Resendiz then steered me to the Pro Tools I/O. We first deleted all of the input settings, then clicked on the restore defaults button. The system found the Focusrite driver software and instantly repopulated the input matrix. I did the same with the output matrix. When I checked the inputs and outputs in Pro Tools, they were now looking at the Saffire Pro 40, instead of the DIGI003R. Just deleting everything and loading defaults is a neat trick. You can also save I/ O setups as separate files. To get back to my DIGI003R, I did the same set of steps, but chose the DIGI003R.
SAFFIRE PREAMPS
The eight Saffire Pro 40 preamps don’t have as much gain as my GML preamps. I first used my low-sensitivity beyer m160 ribbon mic to record voice though both the GML and Saffire preamps. The GML was a little clearer, the Saffire a little thicker, but the differences were very slight. Once I equalized the gains, the preamp noise was about the same. The taper on the Pro 40 gain pots is different. You really have to crank them up a bit before the gain rises.
I did further experiments with my Schoeps cmc641 microphone and GML preamps and Saffire preamps with my Martin D28S acoustic guitar. While not exactly the same, the Saffire preamps did very well. Note to self: The preamps are better than expected for the price, and so is the analog-to-digital conversion. I found no appreciable latency issues, but I wasn’t building a very complex session. If you have big sessions and start to have latency issues, Focusrite makes RTAS MixControl, a utility plug-in, that enables Pro Tools users to blend monitor mixes between audio inputs and DAW output signals during tracking, enabling performers to hold on to true zero-latency monitoring.
I use the Aux inputs on my DIGI003R to monitor the audio from my Mac tower. The Saffire Pro 40 doesn’t have aux inputs, but I was able to use two of the eight channels to achieve the same result. In doing so I did run into one problem. The 1/4” jacks on the Saffire Pro 40 are very slightly larger than those on the DIGI003R. As a result, the connections were just a little loose. If the plugs were moved in a certain way, there was a slight ground buzz, indicating a bad connection. A quick in/out motion with the plugs worked, and a connection was made that didn’t buzz.
A better way to get sounds from the computer system and other applications into a Pro Tools session is through the Pro 40 Loop Back feature. You do that by accessing the sound and audio control panels of the operating system, and choosing Saffire as the output device. The audio then travels down the firewire cable from your computer to the Pro 40, instead of the usually noisier unbalanced system audio output jack. I was able to route soundBlade LE, iTunes, Toast, Quicktime and Soundtrack Pro and web radio through iTunes through the Pro 40 and to my monitors or to record directly into Pro Tools. You don’t have to be running Pro Tools to hear the audio, and you can vary the volume using the Pro 40 Mix Control interface. Pro Tools has a similar capability, but it always seemed to get hung up somewhere, go a bit nuts, and I’d have to reconfigure. So this was a big help, and I could actually record the audio into Pro Tools.
The front panel of the one-rack-space Saffire Pro 40 is straightforward. There are two 1/4” TRS/XLR combo jacks for the unit’s first two inputs. These inputs handle mics or instruments. Phantom powering is applied to inputs 1-4 and 5-8 using two front panel buttons. There are six other knobs for the other inputs whose combo TRS/XLR jacks are mounted on the back. A simple 8-channel LED meter shows activity on all eight inputs. A master monitor output knob with Dim and Mute is followed by two separate headphone outputs, each with its own control.
In addition to the six other inputs, the back panel features eight TRS line outputs assignable by the Saffire Mix Control GUI, a 1/4” TRS pair for Stereo Main Monitor output, ADAT optical and SP/DIF coaxial I/Os, two FW 400 jacks, two old school DIN MIDI jacks and an IEC standard power receptacle. The Pro 40 may also be used as a simple standalone mixer if all you need is the front panel controls. Simply configure MixControl with the Pro 40 connected to your computer and select “Save To Hardware” from the MixControl File menu. You can also daisy-chain multiple Pro 40s for more inputs and outputs.
I found the MixControl with its Input, DAW and Mix selections to be a bit challenging until I got used to them, but they don’t get in the way of normal operation. I did notice that the peak flashers on the MixControl GUI indicated overs where none appeared on my Pro Tools files. Perhaps they use a similar -3.0 flash point to my RME ADI-8 DS.
IN CONCLUSION
The Focusrite Saffire Pro 40 is proof that the price of technology continues to come down, as the capability and quality rise. Nicely Done!
Ty Ford may be reached at www.tyford.com
Technique, Inc. Copyright © 2012

Audio Technica 4047/SV FET Borrows From The Past

$
0
0

Audio Technica AT4047
In today's overcrowded condenser mic market, a neutral mic easily gets lost. To stand out, you need some attitude. That's what the other mic makers are doing, and Audio Technica is now following suit. The AT4047/SV FET cardioid condenser microphone ($695 with mic, vinyl case and suspension mount) is a marked departure for Audio Technica. 

Most of their mics are relatively neutral. The AT4047/SV is not. The company line on the AT4047/SV is that it's "The perfect blend of classic sound and modern precision engineering." Distill the ad copy and what you get is, "new stuff with old stuff." The new stuff is quieter electronics; an extremely respectable self noise of 9dB-A, a whopping output (17.7 mV +/- 2dB @ 1Pa), and a typical dynamic range of 140dB. The old stuff is the use of a new output transformer. 
The right transformer can add attitude. According to Bob Green, Engineering Supervisor Engineer for Audio Technica here in the States,"We've been building our own large capsule mics with dual diaphragm mics starting with the AT4050 back in 1994. We were out to get the old characteristic of an early transformer output coupled condenser mic, but with better manufactured circuitry and elements. 

The transformer is custom wound based on work done in our main development lab in Japan." Green says Audio Technica used some similar circuitry with their latest tube mic, the AT4060. "The capsule of the AT 4047/SV is loosely based on the AT4060, but the diaphragm tension, baffle and other things have been modified." Green notes that both mics use dual diaphragm capsules that help to control the pattern, even though they're a lot more expensive than single-sided capsules. As a side note, the AT4060 is a very transparent and open sounding mic and should do well, but it doesn't have, well...attitude.
I first compared the AT4047/SV to a Neumann TLM 103, through GML mic pres. Although the AT4047/SV has 2dB more selfnoise, it also has about 3-4dB higher output than the TLM 103. When the mics were trimmed for equal level, the selfnoise difference was almost undiscernable. The TLM 103 is smoother and has a thicker sounding bottom. Both mics have somewhat similar midrange meat, but the AT4047/SV has a little bite below the top and a bit more open upper midrange presence. The bite reminds me of that which an API mic preamp imparts on the audio that passes through it. More on that later.
PATTERNS & REJECTION
Both mics develop some phasey artifacts when worked at or past 45 degrees off axis and both lose low frequency response at 90 degrees off axis. Rear rejection was good in both mics, with the TLM 103 losing more high frequencies off the back. Both mics distorted during the key jangle test, with the spectra of distortion being higher in the TLM 103 and lower in the AT4047/SV. 
IN THE BOOTH
For voiceover work, the endearing low frequency proximity boost of many large diaphragm condenser mics gets in the way when the mic is worked any closer than about 6-8 inches. Without the LF rolloff (80Hz, 12dB/octave), the AT4047/SV does exhibit proximity, but has less bottom and proximity than the TLM 103. I could work a quiet voice within an inch of the grille, but not without eddys or popping. With the mic's 80 Hz rolloff engaged, I could easily work up close with only minor pops and eddys. With care, a pop screen, and rolled off, the 4047 can be used as an on air mic, no question. With a foam ball on the mic, I lost just a bit of the edge and gained a lot of control over popping.
Regardless of my earlier comments about the AT 4047/SV not having the bottom that the TLM 103 has, it still has enough to require the bass rolloff and some EQ to keep my Martin D28S fifth and sixth strings from booming. 

The D28S doesn't have the "boom" that a standard dreadnought has, but it's not bass shy either. At those frequencies (basically 80Hz to 110Hz), the mic's 80HZ 12dB/octave rolloff and the 75Hz 18db/octave filter on the Mackie are not usable because they are below the problem frequencies. Tracking flat and directly into my Orban Audicy workstation with the AT4047/SV about six inches out from the soundhole, I found pulling down 7.7dB at 118Hz with a .28Q rebalanced the bottom nicely. 
Next I pulled the mic back to one foot because that's where the handy spec sheet said the mic would provide a more or less flat response. Again, shooting right into the soundhole, I recorded flat. This time, without changing the Q, I only needed to drop 110Hz by 3.8 to 4.9dB. I then moved the mic so that it was about a foot out from the neck/body joint and angled to the soundhole. I still got a very full bottom that required some LF cut. The point here is that for music recording, having a room that either sounds good or doesn't contribute at all with a mic a foot away from the source is a good thing. If your room is not that good, you'll have to move in and deal with the increased bass proximity effect. Note that I didn't have to do any bass tailoring for my voiceover recording. 
Whereas the TLM 103 is a mic with a bigger bottom and more lower midrange, the AT 4047/SV shows more in upper midrange presence. One way of looking at it is that the TLM 103 sounds more intimate...close and warm. The midrange presence of the AT4047/SV makes for a clearer sound. 
FLITE THREE
While the legendary Neumann U 47 is never mentioned in the Audio Technica literature, one might surmise that the intent was to get close to its sound. I stopped at Flite Three in Baltimore to put the AT4047/SV up against their U 47 FET and U 87i. Working with engineers Louis Mills and Mark Patey, using an aging but very respectable API console, we found that the AT4047/SV sounded more like their U 87i (not ai) than it did like their U 47 FET. The AT4047/SV was brighter in the presence range than either the U 87 or U 47. 
I mentioned earlier that the AT4047/SV through my GML mic pres had an edge that reminded me of the API mic pre edge. Since the GML has never produced any sort of edge, I ascribed the edge to the sound of the AT4047/SV, perhaps due to its transformer. Flite Three's API mic preamps did add their own edge. The combination of the mic edge and the preamp edge didn't increase the size of the teeth in the edge as much as it sounded like twice as many teeth of the same size.
The key jangle test at Flite Three supported my earlier listening experiences. All mics crunched a bit, the AT4047/SV crunch showed its affinity for upper midrange presence. We did notice one anomaly while recording Tom Olsen, a local V/O talent. At a distance of six inches, using an aggressive style the U 47 sounded more edgey, while the AT4047/SV became less edgey. I'm not sure which one changed, maybe both a bit. 

The U 87 exhibited more bass than the AT 4047/SV. At six inches the U 87 and U 47 popped, but didn't splat. The 4047 was a bit more resistant; woofing, but not popping. At a foot the bass response of the AT 4047/SV drops off; more so than the U 87. After his brief experience, Olsen offered his own capsule review, "The U 87 had a bigger bottom, the U 47 sounded fuller across the spectrum and the AT4047/SV offered more midrange." At that point the agency producer came in and we used the AT4047/SV on Tom's voice to cut spots for the Pittsburgh and Cleveland markets. Without EQ, the midrange presence allowed Tom's voice to ride nicely over the music track. 
PATTERN COMPARISONS
Checking the patterns of the mics we found the sweet spot of the AT4047/SV was slightly wider than the U 87. At a distance of about four inches, an inch either side of center took us out of the U 87 sweet spot. The AT4047/SV gave us a swing of about two inches either side. 

The AT4047/SV did best at a distance about four to six inches. Any closer and things started to get muddy and ugly. Since I had been able to get closer at my own studio, I can only guess that the difference in preamp/mic coupling was responsible for the differing results. The AT4047/SV picked up more high frequencies from the rear side and grille top than the U 87. At a distance of four feet, the AT4047/SV heard more of the room, the U 87 heard less room but its selfnoise was more apparent. 
IN CONCLUSION
To my knowledge, this is Audio Technica's first time out with an "attitude mic." Hopefully people will get past their preconceived notions about Audio Technica and give the AT4047/SV a try. Incidentally, the first 600 were sent to the distributors in a tweed road case. If you're lucky and quick, you may be able to get one. And try that AT4060 tube mic. I personally think it's the sleeper of the year.
Technique, Inc. © Copyright 1999 All Rights Reserved


AT835ST AT815ST Are Now BP4029 and BP4027

$
0
0


Audio Technica BP4027
This review was written about the AT835ST and AT815ST. The models were changed slightly in 2007 before being renamed the BP4029 and BP4027, respectively. In the rapidly changing world of pro audio, taking things for granted is not a good idea. If you think you know what to expect from a stereo shotgun mic, you might accidentally dismiss Audio Technica’s 9-inch AT835ST ($899) and 15-inch AT815ST ($999) mics. 

The most obvious thing about these two mics is that, in addition to being regular shotgun mics, they offer both M/S (Mid/Side) and L/R stereo, (with both narrow and wide L/R spreads). You may already have heard these mics. They were used extensively for EFP and stereo ambience during the Sydney Olympics.
Both mics come in a vinyl box with mic clip, foam windscreen and a five pin XLR that plugs into the mic and splits to a pair of three pin XLRs. The diameter of both mics is slightly larger than a Sennheiser 416, but small enough to fit properly in a standard rubber, Rycote boom mount.
Audio Technica BP4029
Both mics use the same two electret capsules; a front facing line-cardioid mid capsule, and a figure of eight side capsule mounted directly behind the mid capsule. Both mics require 11-52 VDC at 4mA phantom power. The longer AT815ST weighs less than five ounces; the AT835ST less than four ounces. This makes them well targeted for the EFP/ENG video markets with their rapidly growing need for stereo ambient sound or any other stereo sound gathering application where weight is a factor.
Both mics have the word "UP" embossed on the body to indicate the correct orientation. Both also have two switches, one engaging a somewhat unconventional (keep reading) 80Hz 12dB/octave LF rolloff filter and one for M/S, LR-W Audio Technica BP4029 (wide) and LR-N (narrow). An internal matrixing circuit converts the M/S signal to the two different L/R spreads. Using the line-cardioid capsule only in M/S mode, I found the sensitivity of both AT mics was one or two dB below my Sennheiser 416 and 816 and the AT mics heard a bit more off the sides and to the rear. 
The level of selfnoise was about the same, although the spectra of the selfnoise was different. The Audio Technica mics made sort of a “hiiiiiih“ compared to the Sennheisers’ “pfffffff.”
ROLLOFF REVELATION
One very noticeable difference between these AT mics and others I have used is in the design of the LF rolloff filters. The flat frequency response of the shorter AT835ST begins a LF rolloff at about 500HZ and gently slopes down -3dB at 70Hz and remains there down to 30Hz. Engaging the LF rolloff switch actually increases the LF response between 100Hz and 500Hz. Below 100Hz it then drops off more steeply at 12dB/octave. This means you get more mid bass and less low bass with the LF filter engaged. 
The longer AT815ST flat response has a 3dB bump in the 30Hz-50Hz range that returns to 0dB at 100Hz. Engaging the LF filter causes a 4dB increase between 100Hz and 400Hz, which then drops off gently at about 10dB/octave below 100Hz. Again, engaging the LF filter causes an increase in upper bass and a decrease in low bass.
Both mics also have presence peaks slightly higher in frequency than that of the Sennheiser 416. The shorter AT835ST begins a slow 2dB rise from 1kHz to about 2.5kHz. It then achieves a +4dB plateau from 4kHz to 7kHz, peaks at +5dB between 8kHz and 9kHz and slopes off moderately crossing zero at 15kHz before dropping down to -4dB at 20kHz. The longer AT815ST begins a gentle rise at 1kHz, hits +4dB at 4kHz, dips a dB or two between 6kHz and 7kHz, rises to a +5dB from 8kHz to 10kHz, is back down to +3dB at 15kHz and slopes off to -1dB at 20kHz.
In their flat positions, both mics sound thin as compared to a 416 Sennheiser. With the LF filters engaged, the increase in upper bass makes them sound more similar. The 416 still has more beef in the upper bass and develops its presence peak a bit below that of the AT mics, making them sound a bit “zippier” on top. In my short time with them, I found that I liked keeping them in the rolled off position to get that extra upper bass, while reducing the amount of low bass.
Audio Technica BP4027 Using the two mics in standard shotgun configuration with only the mid capsule, I found the patterns were slightly wider than the the 416, with typical off-axis shotgun phase anomalies. When operated as M/S or L/R, both mics have a slight preference for sound that’s 30 degrees or so either side of front. Move past that and there’s a slight reduction in HF and clarity. You can get that clarity with something like a Neumann RSM 191, which is, of course, shorter and about four times as expensive. 
I did find that, in stereo operation, as a sound source works its way from front to the rear, there’s a point after the source gets past the side capsule at which the mic gets a bit confused and throws the signal to the opposite side. As the sound source continues past the rear axis of the mic and heads back to the front on the other side, a similar “flip-flop” happens. This happens in either L/R mode or in the M/S I matrixed in my Orban Audicy DAW. So if you’re doing sound work at an automotive road rally, it’s probably not a good idea to set up in the middle of a couple of deep curves that have result in the cars crossing the rear axis of the mic. Y M/S?
If you haven’t considered M/S stereo, it's a handy format when you don’t have a clue as to how wide you want the stereo image in the final mix. Although it’s a bit difficult to listen to in the field unless you can convert it to L/R, being able to adjust the width in postproduction is a definite advantage.
If you're using zone mics, you can use an M/S mic as a stereo center spot mic for soloists, using the matrixed mid channel fader to adjust gain for the performer without upsetting the stereo balance of the side channels. I took the AT835ST to Open Stage night at 8x10, a local music hot spot in Baltimore where Craig Hopwood runs the house and mixes PA. Through the 8x10 sound system, the AT835ST sounded a lot more open and clearer than the Shure Beta 58s. Adding 3-4kHz and10kHz at the board made the Betas sound more similar.
Running the mic in L/R wide, I twisted the mic around 90 degrees so it was aiming high and low instead of L/R stereo. Pointing the mic at about the Adam’s apple of a folk singer, I was able to get a split of more voice on one fader and more guitar on the other. In L/R, harmonized vocals with two singers each about a foot and a half away from the mic also worked well. When placed a foot away from an acoustic 12-string guitar, we got a nice image, but ran into feedback trouble when we added more instruments and had to crank up the stage monitors. Back at the studio I had better results under more controlled conditions. 
IN CONCLUSION
The AT835ST and AT815ST are lightweight mics with obvious EFP/ENG applications, especially with a tailored LF response that eliminates low end. Having a LF rolloff filter that increases the middle low frequencies and dumps the lower ones actually works out to be a nice idea. Having slightly “center focused” stereo images means you’ll get some stereo information, but nothing radical that could cause problems later. With their higher presence peaks, and out of the way of blaring stage monitors, either mic might also find use as a stereo drum overhead mic.

TECHNIQUE, INC. © COPYRIGHT 2001
ALL RIGHTS RESERVED www.tyford.com BALTIMORE, MD

Sound Devices MixPre-D Two Channel Mixer with Analog, Digital and USB Outputs

$
0
0

Sound Devices MixPre-D
In the field, in the studio or in post, there are times when you don’t need or don’t want a big audio mixer. Maybe you’ll only be working with a mono or stereo source, but you want something better than camera microphone inputs. In some cases, the devices you’re asked to feed have no reliable balanced, analog audio inputs; computers, iPhones, iPod touch or iPads.


  • Transformer-balanced mic/line selectable inputs
  • 48-volt or 12-volt phantom power
  • "Unclippable" input peak limiters, dual-mono or stereo linked operation
  • Input panning to Left, Center, or Right outputs
  • Mid-Side Stereo (MS) matrix with width control and front-panel channel flip
  • Return can be used as ch3/ch4 aux-level inputs, selectable pan and level control
  • High-pass filters, 80 Hz or 160 Hz
  • Slate microphone and tone oscillator
  • Mic/Line/AES digital selectable outputs, digital SR of 44.1 , 48 , or 96 kHz
  • 24-bit, class-compliant USB streaming output for interconnection with Mac OS, Windows, Linux, and select iOS devices, computer audio in MixPre-D headphones
  • Dedicated mic-level output on locking TA3 connector for unbalanced camera inputs
  • Headphone monitoring of program audio or external return audio
  • Sunlight-viewable, 16-segment GaN LED output meter with adjustable brightness
  • Internal battery-power from two AA
  • External power input, 10-18 VDC
  • High-strength, extruded aluminum chassis with metal connectors
If you find yourself in these situations enough times to do something about it, try the Sound Devices MixPre-D (D for digital). It’s like the analog MixPre because they share a nearly identical front end, but the MixPre-D has 24-bit AES3 and USB outputs. There are some other differences, no input peak lights on the MixPre-D and many of the dedicated external switches on the Mix-Pre have been internalized on the MixPre-D, requiring “hold this, slide or twist that” operation of the remaining buttons, knobs and switches.
For example, to switch sample rates, you need to hold down the headphone level control and switch the left XLR output switch to the AES position. Not a deal killer, but you’ll want to acquaint yourself with the operations manual. Fortunately, Sound Devices printed the info on the MixPre-D bottom panel. You do need to be a little careful about grabbing the MixPre-D because you might inadvertently hit a button that does something you don’t want it to do at that moment.
Sound Devices MixPre-D Input

On the input side, the two 2k Ohm impedance XLR analog mic/line inputs are transformer balanced with 66 dB gain and a very quiet  -128 dBu EIN. Plenty of gain, even for a Sennheiser 421 dynamic mic. Line input impedance is rated at 16k Ohm. Input clipping of the mic circuit doesn’t happen until -10 dBu and +28dBu for line input. Common Mode Rejection Ratio is 100 dB at 80 Hz, 60 dB minimum at 10 kHz. Frequency response is 20 Hz - 30 kHz, +.2 dB / -.5 dB.
Need more than two inputs? If you don’t need stereo headphone return monitoring, each channel of the Tape Return input can be independently routed to the left, center or right output busses. Those sources need to be -10 or line level and adjustable, because the Tape Return input has no mic preamps. Input levels for inputs 3 and 4 are controlled by pressing input 1 and input 2 buttons and turning the headphone control.
Sound Devices MixPre-D Output
The MixPre-D’s has five different stereo outputs; an active-balanced mic/line via two XLRs, an unbalanced, fixed 200 Ohm mic level via TA3M for DSLR cameras (-36 dBu), an unbalanced, fixed 2k Ohm Tape Out via 1/8” TRS, a 24-bit AES3 XLR and a 24-bit USB (cable included). The MixPre-D’s 24-bit A/D converters operate at 44.1 kHz, 48 kHz, 96 kHz, and can be switched at the mixer or from the Apple Audio/MIDI Setup panel after connecting to a Mac. When I connected to my Mac via USB, the MixPre-D automatically detected that the Apple Audio/MIDI panel was set to 48 kHz and switched to 48 kHz. The USB interface works with Apple 10.4+, Windows Vista, Windows 7 (32- and 64-bit) or Linux.
There’s a 2-way switch on the MixPre-D left XLR out for mic/line switching. The right XLR output has a 3-way, for mic, line and AES3. In AES3 mode, the left XLR output continues to pass analog audio as long as either of the inputs are panned to left or center. When using the AES3 mode, the right XLR passes signal from both inputs regardless of panning. So you can have simultaneous analog and digital outputs, but the analog XLR output will not be in stereo.You can still get stereo analog out via the unbalanced Mic and Tape level outputs. Both left and right USB output also remain active in AES3 output mode. Remember to turn down any input pot not being used to keep the unterminated XLR noise from getting to the outputs. 
The MixPre-D supports X/Y and M/S stereo linking and in those modes the high pass filters and limiters continue to work. In X/Y, the channel two pot controls both preamp levels. You can also reassign the inputs to different or both outputs with the output pan switches. During M/S operation, with the mid mic in input one and the bi-directional mic in input two, input one controls the spread and input two controls the overall gain.
The input and output limiters have an adjustable threshold from + 6 dBu to + 18 dBu. The ratio is fixed at 20:1. The attack time is set at 1 mSec with a 500 mSec release time. That’s fast enough for most program material, but sound with very quick transients, like handclaps, may sneak though. The limiters can be set to work jointly as a stereo limiter or independently, such as you might do with a different wireless mic coming in to each input.
The Mix-Pre-D runs on two AA batteries for about four hours if Phantom Power is used, but you can also run it from a 10-18 V DC external supply. Sound Devices also sells the XL-WPH3 AC to DC power supply. An internal poly fuse protects the mixer and resets automatically after an offending power source is used and removed. You can toggle between internal and external power without interrupting signal flow. When the power drops below a certain level, the green power light flashes. 
Even when the flashing light indicated it was time to replace the batteries, with two power hungry Schoeps mics attached and the headphones turned up fairly high, the power supply kept on going without motorboating. A slate mic and builtin 1 kHz tone oscillator round out the package. When slate mic or tone is activated, program is muted. Tone is sent to all outputs. The main metering doesn’t have all of the options on larger format Sound Devices mixers, but VU plus peak works fine for me and the brightness can be adjusted.
During its stay here, I used the MixPre-D to feed analog camera inputs, Garage Band, Adobe Audition CS5.5 on my Mac via USB and from the AES3 output to my Pro Tools Digi 003R. I used a Graham-Patten Systems baluns at the AES output of the MixPre-D and fed the Digi 003R via the S/PDIF input. Although recording voice happened without incident, when I engaged the tone on the MixPre-D I heard cyclical ticking within the tone at the Digi 003R. It was a clock disagreement. As soon as I changed the Digi 003R clock source from my external RME A/D converter to the S/PDIF input, everything was fine.
IN CONCLUSION
The MixPre-D appears to be another piece of good gear in the consistent Sound Devices line. I would have liked more dedicated controls so I don’t have to use various secret handshakes to change settings, but the box works very well. The Sound Devices limiters are nicely set for most program material. If your present chain doesn’t have a good set of stereo limiters, consider using the MixPre-D just for its limiters before your final record destination or PA. Last but not least, Sound Devices offers the very handy XL-CAM accessory mount that allows the MixPre-D to be securely mounted to the bottom of DSLR cameras. There’s also a standard threaded hole on its bottom plate to allow for different mounting options. Sound Devices also offers a variety of interconnect cables and external powering solutions.
© 2011 Technique, Inc. All rights reserved. Contact Ty Ford at www.tyford.com
Sound Devices, LLC300 Wengel DriveP.O. Box 576Reedsburg, Wisconsin 53959 USAPhone: +1 (608) 524-0625http://www.sounddevices.com

Gefell M 900 - The Arty Condenser Mic

$
0
0


M900
There is not a more exotic looking mic than the Gefell M 900 ($995). Part ray gun, part Venutian gynecological instrument, the cardioid condenser M 900 (and its hyper-cardioid cousin the M 910), are striking in their appearance. 
The M 900 is a transformerless, large-diaphragm condenser microphone with a single cardioid pattern. The membrane is a standard 1-inch gold sputtered Mylar membrane. The capsule was designed and computer-modeled at NIKFI in Moscow. According to GPrime, the US distributors, it has a ceramic backplate that is more stable to temperature changes than the often used brass. The conductive side is then chrome-plated. Over that is evaporated a one micron coating of Teflon. The Teflon acts as an insulator between the membrane and backplate and prevents damage as a result of incidental contact between the two. 


* Studio/Live Condenser Mic
* Cardioid Pattern
* Next to imposible to find

Frequency response is quoted as 40Hz to 18KHz. Sensitivity of the M 900 is 17mV/Pa. Due its tighter pattern, the hyper-cardioid M 910 version is slightly less sensitive, at 14mV/Pa. Incidentally, sensitivity is the ratio of the acoustical input to the electrical output. The M 900's active transformerless output removes the limitation on the output capability that would be imposed by a transformer. 
The MV200 amplifier (impedance converter) in the M 900, converts the large capacitive impedance of the capsule down to about 150 Ohms. The electronics also contain a switching power supply to generate the polarization voltage for the capsule, which is independent of the phantom voltage. This allows the mic to have a higher polarization voltage than the phantom voltage. This higher polarization voltage results in higher sensitivity and lower self noise. For compactness and mechanical robustness, all components of the MV200 amplifier are zero-clearance, surface mounted (SMD) on the board. 
COMPARISONS
When compared to the ubiquitous U87 Neumann and AKG C414, all through A.P.I. mic preamps at Flite Three in Baltimore,I observed the following similarities and differences.
The M 900 is at least as quiet as a U87 (not the U87ai), with a slightly higher output. The M 900 is much warmer than the U87, especially at a working distance of less than 4 inches. Due to the proximity effect and the mild sensitivity to popping, the closest I'd want to position the mic for voice work would be 4 inches. Cozy it any closer than that and the bottom overwhelms, unless the voice or sound is thin to begin with. 
The M 900 loses proximity fast. At a distance of 8 inches, it is only slightly warmer than a U87. Back off to about a foot, and the bottoms are almost the same. While each mic has a peak, the M 900 has a brighter top, with a peak somewhere in the 7K-9K range versus the U87's 3-5K peak. 


M 900 vs. C414
The M 900's bottom is similar, but slightly less than that of the C414. The C414 develops it's bass farther down than the M 900. The M900 has more in common than the U87 in their high-frequency responses, with the M 900 being slightly more peaky and the C414 extending out slightly farther. At a distance of 8 inches, the high-frequency bump of the M 900 gives a heavy-pitch delivery an edge. 
The M 900 has less proximity effect than the C414. A distances of 12 inches or more, the loss of low-frequency response thinned-out the mic's sound, making it sound slightly "canny".
Perhaps the most distinguishing feature of the M 900, apart from it appearance, is its off-axis high-frequency response. In fact, one of the design goals was an extremely uniform polar pattern. The M 900 achieves this better than most mics I've heard. A lot of cardioid-patterned mics appear to be more directional because of their lack of their off-axis high frequency response. 
Compared with both the U87 and C414 in cardioid pattern, the M 900 "hears" an amazing amount of high frequencies even at 90 degrees off axis. If performers wandering off mic a bit have caused you problems, the M 900 may be a solution. Given its wide-angle acceptance to high frequencies, I'd like to try a pair of M 900s as drum overheads. Of course, this same feature would likely make them less successful in applications where you were trying to keep extraneous, nearby high frequencies out of the mix. 
The most curious result of the tests was the difference in sound depending on which mic preamp was used. Both the in-board and lunchbox version of the A.P.I. mic preamps made the M 900 sound rough and edgey. There was no such edge when using the Amek/Neve 9098 and Mackie 1604 preamps. 
The M 900 is about as sensitive to popping as a C414. Because of its unusual open-back design a slip-on, foam sleeve pop filter has been designed. I tested the prototype and found that it greatly reduces the popping, without changing the sound of the mic much. 
IN THE STUDIO
I spent an afternoon at 1137 Recording in Baltimore, working with the M 900 and the Amek/Neve 9098. Not surprisingly, the combination sounded as good on vocals as it had at Flite Three. Next we set up for instrument recording. Our source was a Fender Strat through a vacuum tube, 130 watt, Music Man amp-head to a Crate closed-back cabinet with four 12" Celestion 30 watt speakers. In the studio, the speaker cabinet sounded like nothing special, your typical cranky guitar amp sound. 
The M 900 sounded nice, but a bit too thin, until we got it to within four inches of the cabinet and centered on one of the speakers. BINGO! Platinum ribbons of sonic beauty. The hair stands up on my arm every time I tell this part of the story. For comparison we plugged in a Rode NT2. It sounded edgey and harsh, so we quickly went back to the M 900. 
To be sure, the M 900 is not linear. It was adding warmth (and a lot of other things) to the sound of the bare cabinet, which by itself, did not sound anywhere near as good in free air to the human ear. The M 900 provided a sense on connectedness to the sound of the guitar. Maybe the increased warmth was filling in or masking holes in the guitar rig's frequency response. And, maybe, in the wrong situation, where too much bottom would get in the way, a closely positioned M 900 would not fare as well. 
IN CONCLUSION
For both looks and sound, the M 900 definitely makes the grade as a mic that deserves serious consideration for addition to your mic locker. 

Technique, Inc. © Copyright 2004 All Rights Reserved

Event Opal - Bearing down on a gem

$
0
0

Event Opal Monitors
I’ve had the pleasure of using some great sounding monitors over the years and there does seem to be a price/performance ratio. When you start throwing dollars at linearity, low distortion, wide bandwidth, high frequency dispersion, transient response and stereo imaging, the bill adds up quickly. There are only so many ways to steal from the laws of physics, but there is always room for innovation. 
FEATURES
My initial impressions of the Opals, in order of their occurrence, were; heavy, almost 54 pounds a piece due to the large-ish torroidal mains transformers, large aluminum heat sink back-plate and high pressure injection-molded aluminum cabinets. Well-packed for shipping, Clean of line and accessible controls. These are bi-amped, two way monitors; Class AB, 600W Peak on the bottom, 140W Peak on top. 
As of this addendum, after having used the Opals for four years, I still think they are a very special audio monitor. My first listening was done in near-field, about 4 feet out. My initial impressions; these are very transparent, nice highs with no edge, lows that I did not expect from a 7.1” woofer. And not just “air-moving” lows, but lows with tone. Track five on Zachary Richard’s “Coeur Fidele” CD has an indian drum with a very large fundamental down about 40 Hz. The Opals had absolutely no problem reproducing those notes.
I have a few favorite recordings with acoustic bass both plucked and bowed. I heard a very natural tone and timbre, almost as if I were standing next to the instrument, hearing in 3D. A sign of attention to time alignment and transient response. Horns are a good test. “Super Session” has some nice horns and B3, albeit recorded some time ago, but as with the acoustic bass, the horns sounded very real and the Hammond fat and undulating. Steely Dan’s “Aja” was elegantly mixed. The snare had a little rasp I don’t recall in my other monitors, but we’ve come a long way in monitor technology since those sessions. The edge was in the mix, not in the monitors.
To test how well the Opals did when cranked, I spun them around and pointed them down the long end of my room so I could move further back; about six to eight feet. I tried the Richard cut again. I raised the gain until one of the warning lights on the Opal began to blink with the beat. I don’t know what the SPL was, but the Opals were above the, “last playback of the night, smoke ‘em if you’ve got ‘em” level. In about five more drum hits the left monitor safety circuit deployed and the monitor muted. I reduced the volume and about 10 seconds later the monitor regained consciousness and was fine. Impressive sound and self-preservation.
Little Feat, the Neville Brothers, Yes, Jennifer Warnes, Kix, Stones, Henry Mancini’s “Pink Panther’, my own projects. I was listening for anything I didn’t like; distortion, crossover weirdness, honks, beaming. I invited a few sharp-eared friends over. Their responses were similar to mine; very clear, very clean, good stereo image and curiosity as to how the Opals were capable of such a low end given the 7.1” driver. 
I spun the tweeter waveguides 90 degrees and ran the Opals horizontally. The height of the sweet spot got weird, probably due to the highs now bouncing off my table. I moved the Opals to my second monitoring station which offered a better horizontal mount. The Opals had a wide sweet spot, and a more narrow point source super sweet spot. The low end was bigger than needed and I used the Opal’s EQ controls to trim it. As I went back and forth between the Opals and my 3-way JBL L100s, the JBLs sounded nasal and had a smaller stereo spectrum. 
Summary
Bridging realities when moving from one set of monitors to another is a stressful experience; more so if you have been using one pair of monitors for a long time. The Opal’s EQ controls provide a means to ease that transition. The calibration software and mic did not arrive in time to meet my deadline. I am very curious as to what it will suggest. The Opals are not small, but their impressive low end certainly makes them sound bigger than they look. I was very struck by their transparency, how dimensional the sound field was and how live the instruments and voices sounded. Given what they offer, I think the Opals may be underpriced. 
Ty Ford contributes to TV Technology, Radio World, DV and 2-pop. He may be reached at www.tyford.com.
Technique, Inc. © Copyright 2009 All Rights Reserved
At A Glance
Application: Powered Reference Monitor
Key Features: Extensive EQ controls. Two way powered monitors with 1” beryllium copper tweeters with 140W  Peak amp and an innovative 1” throw, carbon fiber composite coned, 7.1” bass driver with 600W peak amp. Optional D/A converter.
Price: $2995/pr
Contact:
Event Electronics
www.eventelectronics.com

Sescom Audio Adapter Cable For iPad 3

$
0
0

I finally got an iPad 3 and, of course, instantly began looking for ways to connect it to audio. Sescom is a very reliable manufacturer of audio problem solvers. I discovered them years ago while writing my first gear reviews for Radio World. I wouldn't mind having one of everything they make just for those  situations where you need to get from here to there and can't.

I don't have an immediate need to get audio into my new iPad 3. I got it so I could use it as a teleprompter. It does have an onboard mic for simple things, but what about things that aren't so simple? Maybe an interview for broadcast or podcast. Because the iPad 3 has a surprisingly good camera; maybe audio for an online video. What about connecting professional mics with XLR connectors? While specs on the 30-pin connector on the iPad 3 show both USB and Fire Wire, I'd still need an easy connection and a USB or Fire Wire adapter. Enter this handy little Sascom cable, the Sescom IPHONE MIC 1RA.

The IPHONE MIC 1RA's mini TRRS plug goes into the iPad 3 headphone jack. That jack is actually bi-directional, so you can input audio and monitor at the same time. (There was a slight delay on the audio app I was using.) The cable has a DC blocking circuit to keep unwanted low voltages from running back up into your microphone.  If the app you choose has a monitor out, you can plug in some headphones and monitor while you record and playback. I'm still looking for the perfect app for this sort of recording; one that has input meters, allows some form of basic editing and takes advantage of the iPad 3's 24-bit recording. Maybe one that also does stereo recording. But, for now, the IPHONE MIC 1 RA is a handy addition to my kit.

Technique, Inc. © Copyright 2012 All Rights Reserved

iPad 3 As Teleprompter

$
0
0


Datavideo TP-200
The Datavideo TP-200 Teleprompter system with prompter software turns an iPad, iPad 2 or iPad 3 into an through-the-lens teleprompter and can also be used as a below-the-lens prompter. What about the eye line when the text is not in front of the lens? I was on a shoot with the talent a little over seven feet away from the lens. Even though the iPod they used was held below the camera lens, the eye line was acceptable. 

Pro: Economical, Lightweight (4.2 lbs) through the lens prompting on an iPad 3

Con: Only fits cameras with 8.5 inches between the nut and lens. Software is very basic or slightly buggy.

The Datavideo TP-200 kit arrived well-packed from B&H and was relatively easy to assemble. The kit consists of a basic frame, the glass, some spacer bars, a cloth snood (a cloth tube connecting the lens to the prompter frame.) and a bag of nuts and other mounting hardware. There were a few awkward “where does this go” moments due to the sparse instructions, but there aren’t that many parts and enough pictures. I will mention that there are two small holes in the top of the glass frame into which the two ends of a wire are placed that suspends the cloth snood so it doesn’t fall between the lens and the glass. The instructions showed and mentioned the wire, but not where it attached. I eventually figured it out.

Attach camera plate to frame
My first concern was whether or not my Canon XL2 would fit the frame properly. I removed the mounting plate from the camera, attached it to one of the many holes on the bottom of the Datavideo frame and locked the frame onto my tripod.
Attach frame to tripod
Attach camera to frame.

After that, one bolt comes up through a slot in the TP-200 frame and screws into the base of the camera. If you have really big fingers, reaching through the frame to tighten the bolt will require patience or someone with smaller fingers. 

When I tried to mount the Canon XL2 with stock lens, I found I had to remove the lens hood because it was bumping the prompter glass. If the distance from the mounting nut on the bottom of your camera to the front of your lens is greater than 8.5”, the camera won’t fit. There is a bit of wiggle room. The kit comes with two spacers, each 1/2” thick. Raising the camera up on the spacers will move it away from the bottom part of the glass allowing space for a longer camera body. 

The Canon XL2 and prompter balanced nicely on my Sachtler DV6 SB head and tripod, with absolutely no tipping problems. To get to below-the-lens, you just turn the camera around on the main frame and remount the bracket that holds the iPad onto the opposite end of the frame. You can also mount the frame on a separate tripod in front of the camera tripod. 


I couldn't put the iPad on the rig because I was using it to take these pictures.
IMPORTING TEXT
Using “dv Prompter” software also by Datavideo, you can get copy into the iPad by sending it via email, providing you have Internet access or have an already received email. From there, it’s a simple copy/paste procedure. If you don’t have a connection, you can connect your iPad via USB to a nearby computer that’s equipped with iTunes and import using iTunes. It’s a bit weird, but it works. 

First, make a text-only version of the document on your computer. You can do that by doing a “save as” of a document from your word processor. Connect the iPad to your computer via USB. Open iTunes on the computer. On the left margin of the iTunes window, you’ll see the iPad. Click on that. A new window will open. At the top of that window, click on the App button. Then scroll down and select the DVPrompter icon in the left panel. Use the “+” click-on to add a document to the list. Clicking the “+” icon opens a window that shows your computer directories and you can choose the text-only file you want. Then click on the SYNC button at the bottom of the window. Pull the USB cable and start dv Prompter on your iPad. The new file will be in the dv Prompter window.

REMOTE CONTROL
This kit comes with a hardwired remote control with 9.5 foot cable that plugs into the audio jack on the iPad 3. The remote has four buttons; speed up, slow down, stop and start. The remote is small enough to hide in your hand, but the buttons do click slightly when pushed. Depending on how much noise there is on set or how much music you intend to add in post, you may or may not hear the clicking. 

I couldn’t get the prompter to run slow enough until I tweeked the Scrolling Speed and Slow time settings on the software control panel. On that panel, you can also change fonts, font size and color, background color, landscape or portrait view, mirrored display, VGA or composite external display, border, justification, auto-start, delay-start, remote start (including wired and two wireless) and break marker.

WIRELESS!?
I hadn’t seen any reference to wireless in the manual, but did see it in the Settings Menu. If you already own a TP-100 or TP-200, Datavideo sells a wireless kit for $140, but I didn’t have it here to try. Instead, I used the Bluetooth wireless keyboard that came with my iPad case. I powered up the keyboard and went to the iPad 3 Settings menu to connect the keyboard and iPad. Then I went back to the prompter software and chose Remote Type>Wireless. After punching around on the keyboard I found the dedicated volume up/down keys were mapped to change the speed of the scroll. Your distance may vary, but I was twenty-four feet from the iPad 3 and still had control. That worked just fine, but where will the prompter operator sit to see the display?

Teleprompt+ Prompter App
What I was hoping for was a setup where I could use a Mac Notebook computer and two iPads, each iPad displaying the same script and each iPad independently adjustable for mirrored and non-mirrored text. I was able to do that once after startup, using Bombing Brain Interactive’s Teleprompt+ for iPad v. 2.4.3 ($14.99) from the iTunes App Store and the Mac application, Teleprompt + for Mac v. 1.4.0, ($24.99), downloadable from their web site. You can control the scroll from your Mac but only one iPad will respond with mirrored text. 

Using my Mac notebook for control and my iPad3 mirrored on the Datavideo frame, worked on the first try, but each time I changed the script, the Teleprompt+ application running on my Mac Notebook crashed. If they can fix that and iron out a few other wrinkles, they’ll have a smoking software; especially if you can hit two iPads from one notebook.

I got two iPads working together with one being a slave and one being a master. You can even flip the master to and from mirrored by touching a small icon on upper left of the master screen. Unfortunately, using either WiFi or Bluetooth, the text on the master jumps a little during scrolling. This is a minor annoyance for an operator, but a real pain for talent when you want to use both screens as prompters for talent and operate them from a wireless Bluetooth keyboard. 

In all cases, you need to log all gear onto a Wi-Fi or Bluetooth network. Notebook or Tower Macs, operating at OS X 10.6 and higher, can create a peer-to-peer Wi-Fi network. That worked. Since I was using Bluetooth for remote scroll speed, I used Wi-Fi to connect the two iPads. This also worked between my Notebook and one iPad 3, but with the same limitations as above.

I was told that the scripts had to be on both devices to work properly. I found out by trial and error that the host iPad could bring over scripts from the slave with no messy file transfers. Who knew? 

IN CONCLUSION
At $575, the Datavideo TP-200 is a great little lightweight gimmick for iPads that will save you time and money. If they run the software around the track a few more times, it’ll be even more fun. And remember, your camera mounting nut on the bottom of your camera can't be more than about 8.5 inches away from the front of your lens our your camera won't fit on the prompter frame. 

Datavideo also makes a TP-100 rig for SmartPhones and the TP-300 kit for Andriod tablets. Datavideo’s  dv Prompter software is a free download from the App Store.

Technique, Inc. © Copyright 2012 All Rights Reserved

Reach Ty Ford at www.tyford com

Non-backlit Lectrosonics Transmitters On Sale

$
0
0

Looks like B&H is moving three Lectrosonics non-backlit transmitters at a savings. Check them out if you've been looking. No way to tell how many they have left.


The HM Digital Hybrid for $915

  • Digital Hybrid System Avoids Noise
  • Superb Audio Quality
  • 5, 18, & 48 Volt Phantom Power
  • Powerful Range - 100 mW Output Power
  • Works with a Wide Variety of Receivers
  • Backward Compatible With 100, 200, & IFB
  • Made in the USA


SMQV Super-Miniature with pouch for $1179.95


  • Variable, Selectable Power Output
  • Dual Battery
  • Includes Pouch
  • Digital Hybrid Technology
  • No Compandor Noise
  • Servo Bias Audio Input
  • 256 Frequencies
  • 200, 100 and IFB Series Compatible
  • Frequency Block 23


SMV Super-Miniature with pouch. $1099.95


  • Frequency Block 21
  • 50 & 100mW Selectable RF Power
  • Single Battery Housing
  • Includes Pouch
  • Digital Hybrid Technology
  • No Compandor Noise
  • Servo Bias Audio Input
  • 256 Frequencies
  • 200, 100 and IFB Series Compatible

664 Mixer Introduction Video

Not Your Father's AKG C 414 XLS and XL II

$
0
0


For the last ten years, established microphone companies have had to find a way to fill the product lines with low cost mics to meet lowball trigger prices. 

Something has to get lost when you're forced to make mics that cost 1/2 to 1/4 of the standard line. It's not all bad though. 

That challenge teaches you how to economize and streamline manufacturing procedures. But in the end, you're making hamburgers and hotdogs instead of steakI'd like to think we're coming out of that dark period and that the lessons we learned will result in better microphones. 

I see these two new AKG C 414B mics as evidence that this is true. Technically, this new breed of C414B is more sensitive, has less selfnoise, has better capsule isolation and has more features.


Application: Studio and live recordings or PA.
Key Features: Five patterns, multiple roll-offs and pads, low selfnoise, high sensitivity, includes suspensionmount, pop filters and hard case.
Price: $999 for the XLS, $1,099 for the XLII

Even better, the price ($999 for the XLS, $1,099 for the XLII) has actually gone down rather than up, especially if you consider the total package. The hard case comes with a compartment for the PF 80; a 16 inch long flex arm with circular pantyhose type pop filter and boom arm mounting bracket. A standard, low profile W 414X slip on pop filter is also included as is the H 85 suspension mount. Bottom line; you don't need to pay extra for these functional accessories. But, I'm getting ahead of myself.

The Headgrille of both the XLS and XL II (silver front grille and gold front grille, respectively) are slightly wider and taller than the older models to accommodate the new capsule suspension mount. AKG has made major advancements in acoustical isolation of the capsule. That was made alarmingly apparent by tapping on my older B-ULS. The stunning difference points to the absolute necessity of the suspension mount when using the older model.

The Headgrille of both the XLS and XL II (silver front grille and gold front grille, respectively) are slightly wider and taller than the older models to accommodate the new capsule suspension mount. AKG has made major advancements in acoustical isolation of the capsule. That was made alarmingly apparent by tapping on my older B-ULS. The stunning difference points to the absolute necessity of the suspension mount when using the older model.


UNDER THE HOOD
Dismantling the mics reveals that AKG has come up with some new tricks. In addition to SMT (surface mount technology) for the three circuit boards, the pattern, high-pass and pad buttons on the case are mechanical tabs that clip on to the inner assembly. The real controls are soldered onto one of the three internal circuit boards. You press the tab and it moves to press the switching controls. These new controls also mean you'll never rip another fingernail while changing pattern, pad or EQ positions on a C 414. The three printed circuit boards are interconnected by gold-plated multipin connectors.


A SENSITIVE NEW AGE MIC
Both new models use the same circuit boards; only the capsules differ. According to AKG, both mics have the AKG response dimple (about a 2 dB dip between 1500 - 2000 Hz). 

The XLS has a mostly linear response. The XL II has a broad rise in the upper midrange. Instruments miced at a distance can also benefit from this "acoustical EQ" since it restores frequencies lost in propagation. Both models are about 5 dB more sensitive than my older C-414 B-ULS; a -38dBv versus -33dBV open circuit sensitivity. 

When trimming two channels of GML mic pre to equal levels, the newer mics exhibited noticeablyless selfnoise. That difference falls into line with the published 6 dB-A selfnoise figure. That makes the new mics both quieter and more sensitive than their predecessors.

The new C 414B have five patterns instead of four. The extra pattern is a wide cardioid that's wider than the standard cardioid. The new pattern switching circuitry takes about ten seconds to change patterns. There is a click heard when switching from cardioid to hypercardioid and from cardioid to wide cardioid, but it's much less offensive than the relatively loud THUMP in the older model.

The new mics offer more pad choices. Whereas the older C 414s only employed a -10 dB and -20 dB pad, the new mics provide -6 dB, -12 dB and -18 dB. Padding is achieved, not by adding resistance before or after the FET, but by lowering the voltage on the capsule. 

Whereas the older models' high pass filters were set at 75 Hz and 150 Hz, the XLS offers more usable 40 Hz (with a knee at 50 Hz), 80 Hz (with a knee at 100 Hz) and 160 Hz (with a knee at 200 Hz). In omni, the frequency response plots of both mics are very similar.


On the way from omni to figure of eight the XL II steadily increases in high frequency response until it shows a broad plateau with a +5 dB peak at 6 kHz. Proximity effect for both mics, while in directional patterns, starts at about seven inches in cardioid, a bit further out in figure of eight. 

At a foot, while the increased brightness of the XL II is not so apparent in wide a cardioid, it becomes increasingly apparent though cardioid, hypercardioid and figure of eight. 


Move out to about three feet and the air attenuates the high frequencies. The XLS remains flatter through its pattern shifts.

LED PEAK FLASHER
A thoughtful added function of these mics is that the polar pattern LEDs will blink red for .3 seconds if the sound level exceeds 2 dB below clipping. Of course, the position of the mic might not make that LED visible. 

The LEDs won't light if phantom power isn't present, which is a good way to let you know if there's a problem with your phantom supply. If phantom power is removed, the mic will remember all of it's settings and return tothem when phantom power is restored. You can "lock" all three mic switch settings so they can't be changed by holding down the pattern switch for about 3 seconds. 

The display will blink red once and you're locked. The only disconcerting part of that operation is that the pattern appears to change from the one you wanted when you push the pattern switch and hold it. While the display does move to the next pattern, after three seconds the red LED lights under the pattern you started with and it is replaced by a green LED.

THE MATING GAME
Some engineers don't like the C 414 because it sounds too bright, too zippy, too edgey. In an effort to get to the bottom of these comments, I've found that the C 414 mates remarkably better with some preamps than with others. Extended experiments with my GML, Aphex 1100 and Millennia Media STT-1 preamps recording acoustic guitar and vocals proved the right preamp makes a big difference. 

Even with the brighter XL II in its brightest figure of eight pattern, the GML and Aphex were both very smooth and thick sounding. The Millennia Media STT-1 was smooth with just a hint of edge. A Focusrite Red 2 (transformer) and Yamaha 02R (no transformer) preamp sounded harsh by comparison. Go figure. It would be really nice if these mics could be tweaked in a future version to be more accommodating to a wider selection of preamps.

IN CONCLUSION
Less noise, more sensitivity, much better isolated capsule, more patterns and high pass options, peak LED, lockable switches, two pop filters and a suspension mount. Sounds like AKG has been listening intently to the market and is back to making steak. I'm not chucking my B-ULS, but the new C 414B XLS and XL II are no-brainers. If you're in a small space doing a lot of close micing, I'd suggest you try the XLS due to its flatter top end. 

Contact: AKG at www.akg.com

Product Points
Plus: More open sounding, quieter, more sensitive, better acoustic isolation, more patterns, peak flasher, accessories included.
Minus: Doesn't mate well with all preamps.
Technique, Inc. Copyright 2004, 2012 © All Rights Reserved 


Centrance MicPort Pro - 24/96 Audio On A Stick

$
0
0

This product has been out a while since my review, but people keep asking for this type of solution, so I thought it worth bringing it back to the surface. In my never-ending search for neat audio toys to talk about, Centrance’s diminutive MicPort Pro caused an instant smile. 24/96 audio from any mic level source you can put in your pocket; all for $150.

Product Capsule Centrance MicPort Pro
Mic level 24/96 USB Converter-Works with any XLR mic or mic level
-Phantom Power
-No latency-No power required
I’d been waiting for something like this after looking at USB mics for clients who wanted to bypass the mic-mic preamp-input card topology for something simpler. Rode’s Podcaster mic gets points for solving the USB latency issue by putting a headphone jack on the mic. But what about all the other non-USB mics out there? So many mics, so little time. 
The Centrance MicPort Pro is a simple, four and a half inch long barrel with a female XLR on one end and a USB port, headphone jack and Phantom Power switch on the other end. The Phantom Supply current runs at a healthy 48V DC, 20 mA; more than enough for the hungriest condenser mic. There are also rotary mic gain and headphone gain knobs on the barrel. The headphone amp gain is very healthy. When you plug the USB cable in, a sexy, translucent white ring around the unit lights up to let you know you’re connected. 
You do need to know a little about the sound control panels in your computer and the preferences panels of your applications. They need to be visited to make sure MicPort Pro is recognized. Everything worked fine with my 10.4 Macs, but I did run in to a few small problems with the newer 10.5  Macs. The audio sounded garbled when I tried to record into Quicktime Pro 7.4.5. After I changed the Mac sound control panel to record and playback at 24-bit, 48 kHz Quicktime recorded and played back properly. Curiously, when I recorded into Soundtrack Pro at 24/96 and exported the file, Quicktime Pro recognized the file as 24/96 and played it with no problems. 
Quicktime’s record level metering is overly conservative. Peaking at anything over half scale resulted in clipped peaks. If you have apps that aren’t 24/96 compliant, scaling the system control panel back should work. 
Soundtrack Pro 2.0.2 on my 10.5 Mac had an unusual but solvable latency issue. While monitoring with headphones from MicPort Pro, I selected MicPort Pro from monitoring from the Soundtrack Pro panel. That resulted in delay. Switching monitoring to “none” in Soundtrack Pro got rid of the delay and I could still hear my voice and playback.
Garage Band ‘08 was very obliging, allowing me to record a Sennheiser 421 dynamic mic as a stereo or mono track. SKYPE and Apple’s iChat required that I switch to 48 kHz. 
With the Sennheiser 421, I had to turn the MicPort Pro mic gain control up all the way while I was talking at a subdued conversation level with the mic about two inches from my mouth. Even with the gain full up, there wasn’t a lot of circuit noise. Using iChat and SKYPE, I talked with friends in far away places with better than average quality. In fact, using the Sennheiser, I got comments that the audio I was sending over SKYPE was better than most cell phones. 
More sensitive condenser mics required less gain and could be used at further distances. My Schoeps cmc641 sounded good, but not as good as it sounds when recorded through my studio’s pricey preamps and A/D converters.
In Conclusion
There’s a lot going on inside that little tube. Powering MicPort Pro with USB-available voltages requires two switching power supplies; one for the circuitry and light and one for the Phantom Power. Being able to quickly convert any mic level source, including Phantom Powered mics, to a 24/96 digital signal with input adjustment and headphone monitoring makes Micport Pro a very handy tool.

www.centrance.com 

Rode NTG-3 Shotgun Mic

$
0
0


NTG-3 and MKH 416 open for close inspection

A $699 USD street, the Australian-made Rode NTG-3 seems extremely well-placed for its price and performance. Like the Sennheiser 416, the NTG-3 is an RF-condenser that combines a somewhat sophisticated RF circuit with the capsule to reduce the deleterious effects of high humidity. Tricky to design, but worth the effort. That design element has contributed greatly to the 416ʼs “bullet proof” reputation and should do the same for the NTG-3.

FEATURES
The RF environment is growing significantly more hostile, though, and Rode seems to have taken shielding a bit farther than Sennheiser did back in 1974 when the MKH 416 came to market. Attention to the mechanical and electronic lay out of the NTG-3 including the surface mount technology (SMT), PCB layout, component selection and dual chamber design of the internal brass tube that appears to separate most of the circuitry from the tunable RF section and capsule, all contribute to RF resistance and mic performance. Sennheiser has also gone to SMT and other upgrades with all of their later model MKH 416 mics.

The upper chamber and part of the lower chamber of the internal metal tube in which the circuitry and capsule sit is completely covered by a thin grounded metal mesh. Just behind the capsule a rubber o-ring in a small groove and one closer to the tip snug the internal metal tube inside the slotted outer tube. The internal tube runs the full length of the outer tube for increased shielding. A small foam plug a little over a half inch thick sits within the top of the internal tube to reduce popping. The extended upper section of the internal tube, above the capsule, has two rows of precision holes drilled on opposing sides covered with a thin fabric to mechanically filter the sound once it has already been filtered by the slots on the outer tube.

Rode also adds some further insurance by integrating their longer pin 1 ground pin into a very well designed grounding scheme. The XLR connector is not stock. The base is machined from solid brass. The ground pin is permanently mounted into that case. Pins two and three are isolated via Teflon bushings. All pins are gold-plated.

The Rode NTG-3 employs a line gradient supercardioid capsule. Output impedance is 25 Ohms. Sensitivity is listed at -30 dB re 1 Volt/Pascal (31.6 mV @ 94 dB SPL) +/- 2 dB @ 1kHz, EIN noise is 13 dB-A and it can withstand 130 dB SPL. The 416 and NTG-3 share the same 13 dB-A selfnoise and sensitivity. At about a quarter inch longer and about the same weight as a 416, the NTG-3 weighs less than six ounces. Its matte champagne finish is not reflective.

Itʼs not unusual to have to roll the low end off on a 416 these days unless youʼre in the middle of nowhere or in a studio. Sanken rolled off the bottom a bit with their CS-3e and Rode follows suit with the NTG-3, so thereʼs not quite as much in the upper bass or lower midrange on the NTG-3. That makes the NTG-3 sound slightly crisper and brighter. More so when used very close. As you back it off, though, normal air diffusion makes any high-frequency differences between the two mics pretty unnoticeable. However, the fact that my 416 is over fifteen years old may suggest that it may not be as bright as it once was. Regardless, with a zep and a furry, of course, youʼll lose a bit of top end.

IN USE
The NTG-3 pattern is a little wider than the 416, with more gently sloping shoulders. This translates into a more forgiving pattern for two-shots, but youʼll also hear a bit more ambience. My 416 has a little spot about ninety degrees off axis where thereʼs a slight return of high frequencies. The NTG-3 does not. Both mics sound about the same from the rear. The NTG-3 sounded fine on my K-Tek carbon fiber boom with a Rycote Softie suspension mount. The NTG-3 had less low frequency boom handling noise, mostly because the 416 noise had more LF content due to its response.

After not picking up any interference with my Verizon cell phone sitting next to the NTG-3, I made a point of taking the NTG-3 to the mall with my location recorder and headphones to visit T-Mobile, the Apple store and AT&T. There was no interference, even with phones operating right next to the NTG-3. I was using Whirlwind Accusonic +2 cable and connectors. The shield was not tied to the XLR shells.

Want to hear the mics? Download an mp3 here. https://www.dropbox.com/s/yo15m9r0897zxeo/TyFordNTG3MKH416.mp3

SUMMARY
The Rode NTG-3 appears to be a very solid piece of gear. The efforts to eliminate RF are noted and appreciated. I like the unique and very handy padded metal storage tube. The foam windbreaker and simple mic clip all add value to the package. I think youʼll be seeing NTG-3s show up in more kits soon. At the moment, I canʼt see why not. Nice job Rode.

Technique, Inc. © copyright 2008 All Rights Reserved
Ty Ford may be reached at www.tyford.com.

FAST FACTS
Application: Film, ENG/EFP audio.
Key features: Designed to withstand todayʼs harsh RF environments.
Price: $699 USD Street.
Contact: Rode www.rodemic.com

Rode iXY Stereo Mic unlocks 24/96 Audio for iPad and iPhones

$
0
0

Rode iXY Stereo Mic
My Rode iXY just came in recently and I plugged it into my iPad 3 right away. I downloaded the Rode recording app from iTunes and began reading the manual to find out which gestures did what. Do that first and you'll get a lot more fun out of yours.

Not that there's a lot to read, but knowing that spinning your iPhone or iPad 180 degrees puts you in and out of edit mode is not something you might think of.

The iXY supports 24/96 recordings and also lower sample rates. More on this $199 wonder as I have time to work with it. 
Viewing all 84 articles
Browse latest View live